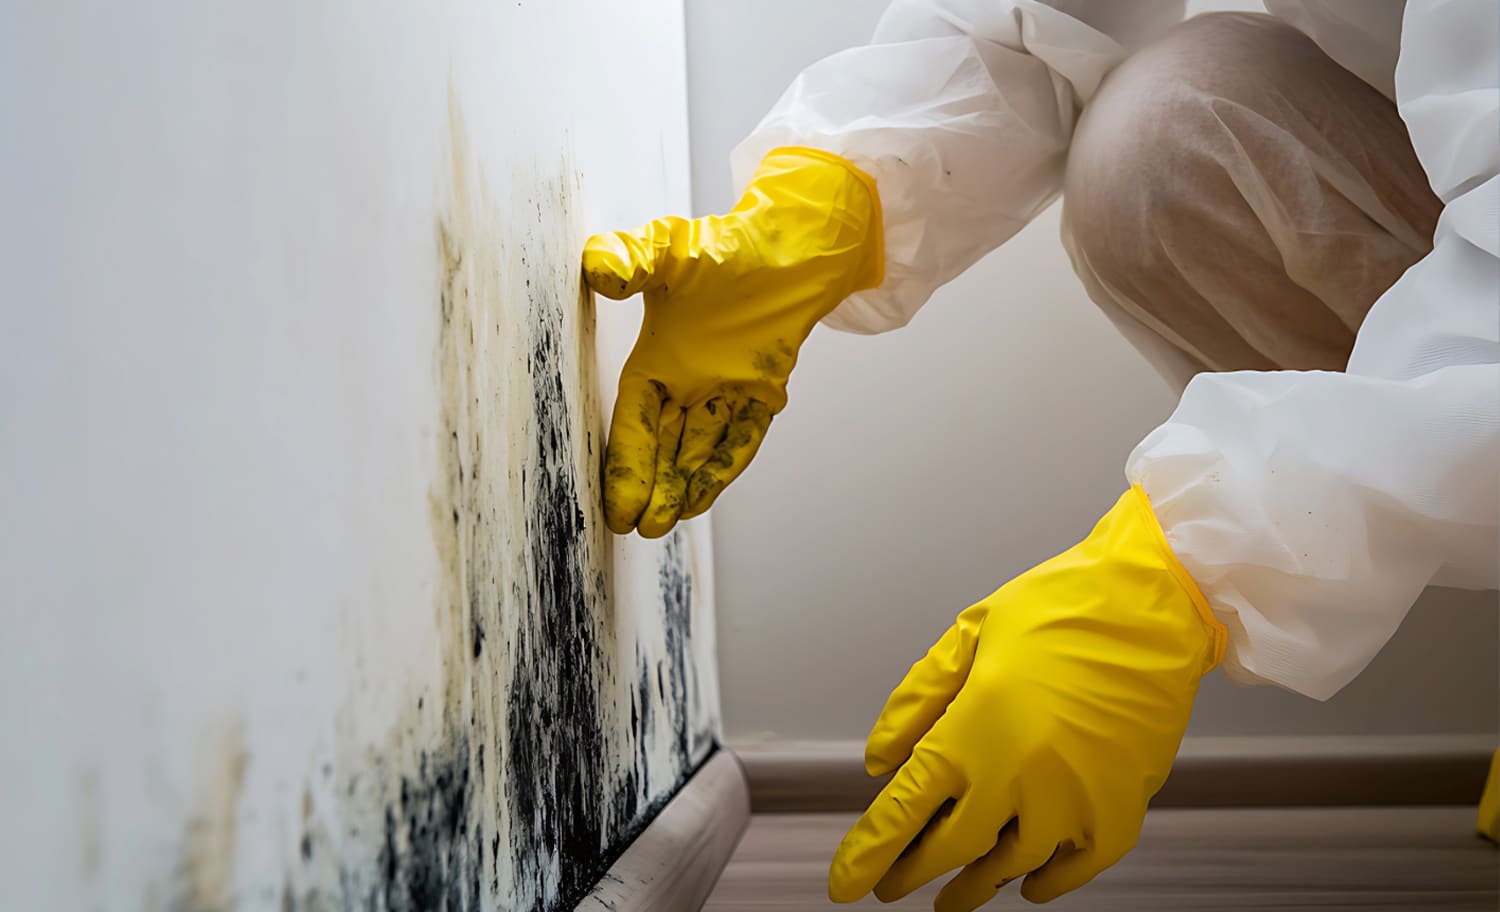
When mold removal experts step into a property, the concern is rarely just what is visible. In many cases, the real issue lies beneath the surface. A small patch of hidden mold in the wall or ceiling often points to a larger moisture problem developing quietly behind it. By the time experts are called, the mold has already spread. From a contractor’s perspective, the priority is not just removing what is visible but assessing how far the impact may extend. Careful planning is required to ensure that the affected areas are thoroughly cleaned and the property is restored.
Table of Contents
ToggleWhy Mold Inside Walls Is More Serious Than It Looks
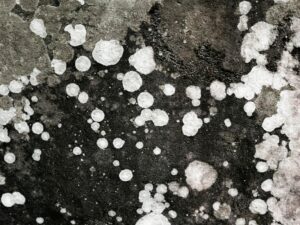
Mold inside wall cavities is not a cosmetic issue; it is an internal issue. In our field experience, hidden mold typically starts with a minor moisture event. It may occur due to a slow plumbing leak, condensation inside the walls after heavy rains or flooding, or water leakage from an appliance. These issues are common in older properties. Once moisture is trapped within the property, mold can begin to form within 24 to 48 hours. From there, it spreads through insulation, drywall, and even structural framing.
For property owners, the risks include:
- Escalating mold damage repair costs
- Inconvenience due to emergency repairs
- Health-related concerns
- Asset value impact during inspections, refinancing, or disposition
Common Signs of Hidden Mold in Your Walls to Look For
Hidden mold does not stay hidden forever. It leaves signals. The key is in noticing early indicators before escalation.
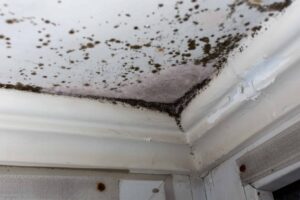
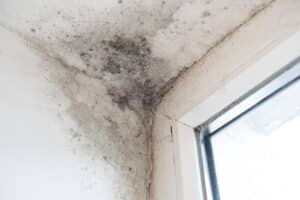
- Recurring Wall Stains or Discoloration
Stains and signs of mold in walls are a red flag. Especially near bathrooms, kitchens, or exterior walls. If the surface looks damp or uneven while the surrounding areas are dry, there is a strong likelihood of moisture inside the wall. - Persistent Musty Odors
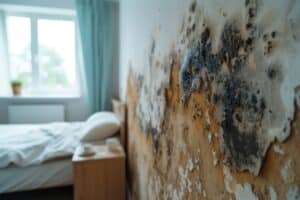
A musty smell in the wall is often the first sign of mold before anything becomes visible. It is essential to get it checked and identify the underlying source. The delay in identification and action often allows the issue to worsen. If the odor is localized to a specific wall or room, it should not be ignored. - Mold behind Drywall or Soft Spots
Walls should not feel soft. Bubbling paint, warping, or slight surface ripples indicate moisture intrusion. In many of our projects, soft drywall has already been compromised internally by the time it is noticeable. - History of Water Events
Any past leak carries risk. Roof leaks, pipe bursts, or even minor seepage behind fixtures can create the perfect environment for mold growth. If those areas were not professionally evaluated after the event, there may still be hidden damage.
Health Concerns
Residents may experience incidents of coughing, allergies, or discomfort that improve when they leave the premises. These signs need further investigation by mold specialists.
How to Detect Hidden Mold: A Professional Approach
From a contractor’s perspective, mold is not something to guess. It requires a structured approach backed by the right tools and controlled execution.
Step 1: Identify Moisture Before Opening Walls
We start by confirming whether moisture exists behind the surface.
- Moisture meters help detect hidden dampness
- Thermal imaging highlights temperature variations linked to leaks
- Visual inspection focuses on high-risk zones like plumbing, walls, and exterior assemblies
This step prevents unnecessary demolition and helps define the scope accurately.
Step 2: On-Site Assessment and Scope Definition
Once moisture is identified, the next step is to understand how far the impact may extend before any opening work begins. From a contractor’s standpoint, this is a controlled evaluation based on site conditions, material behavior, and layout.
Step 3: Containment and Safety Protocols
One of the biggest mistakes we see is uncontrolled demolition. Opening a contaminated wall without containment can spread spores across the property. This turns a localized issue into a property-wide problem. Professional mold remediation includes sealing the work area and using negative air pressure systems. This is critical in occupied properties.
Step 4: Selective Mold Removal of Affected Materials
Not every wall needs to be demolished. We remove only what is impacted. This typically includes contaminated drywall, insulation holding moisture, and any compromised materials within the cavity.
Step 5: Drying, Treatment, and Prevention
Before rebuilding, the area must be completely dry. We use controlled airflow and dehumidification to eliminate residual moisture. Surfaces are then cleaned and treated to prevent regrowth.
Step 6: Rebuild with Better Protection
This is where experienced contractors add value. During reconstruction, we address the root cause and improve ventilation where needed, correct insulation gaps, and upgrade materials in moisture-prone areas.
When to Act Without Delay
In property operations, timing directly affects cost and disruption. You should move forward with professional mold removal when:
- Stains or odors keep returning
- There is a history of recent past water damage
- Walls feel soft or show visible distortion
Delaying action rarely saves money. In most cases, it increases scope, extends downtime, and complicates project coordination.
Hidden mold is one of the most underestimated risks in your property. It sits behind finished surfaces, progresses quietly, and surfaces when the cost to fix is significantly higher. Contractors at Renu believe that the solution is straightforward – detect early and act fast. For property owners, this translates into fewer surprises, better cost control, and a more stable operating environment. If there is one takeaway, it is this. Do not wait for visible damage. By then, you are no longer fixing a problem; you are managing its consequences.
#MoldRemoval #PropertyRestoration #MoldDamage #MoldRemovalCompany #MoldCleanup #MoldRemediation #HiddenMold #Dallas #LasVegas #Phoenix